Vera Olkhovskaya
To sew a down jacket or a warm jacket, we need three types of fabric and applied materials:
- raincoat fabric - fabric for the “top”;
- lining – fabric for the reverse side;
- insulation – fabric for laying between the “top” and the back.
- tape for sealing seams;
- zippers;
- buttons;
- laces, end caps and drawstring fasteners.
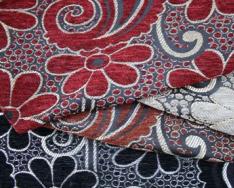
How to choose fabric for the “top” of a down jacket or jacket if you sew it yourself
There are many fabrics available for jackets.
For example, raincoat fabric “Canada”, raincoat fabric “Alaska”, raincoat fabric “Gloria”, duspo, raincoat fabric memory, cotton memory, raincoat fabric “milk” printed and plain, raincoat fabric on knitwear, memory “prince”, parka “Canada”, raincoat fabric melange , bologna, taffeta raincoat, gabardine raincoat, taslan... The list of fabrics can be continued.
Almost everything is suitable for sewing down jackets, and here you need to be guided, rather, by your own taste and idea of what you want to get in the end, rather than by recommendations.
The most important component of raincoat fabric is its water-repellent properties, which can be achieved either by impregnation with latex or polyurethane, or by melting the top layer of the fabric.
Examples include barrier, gloria, and bologna fabrics, which protect from both moisture and wind. These are good materials, but they do not allow air to pass through, which makes products made from them not always comfortable to wear.
Therefore, it is important to look for membrane-coated fabrics. Membrane materials can be two-layer or three-layer – the latter are more expensive.
Fabrics that are breathable but not waterproof are less common. An example is taslan fabric; besides, taslan dries very quickly. It is made with various impregnations.
To simplify the cutting and sewing process, you can buy a “raincoat fabric already quilted on padding polyester” or even a “raincoat fabric quilted with a lining” for a jacket or down jacket. Despite the obvious advantages, here we may encounter both the disadvantages of stitching and the inability to choose one of the fabrics separately.
From such sandwich fabrics it is better to sew laconic products, the open sections of which are easy to edge.
How to choose a lining for a jacket or down jacket
Lining fabrics also come in a wide variety. In order not to “spread the thought on the tree,” let’s define the main types of lining fabric suitable for sewing down jackets, parkas or jackets:
- sliding;
- non-slip;
- quilted with insulation;
- and fur.
With sliding linings, everything is more or less clear - these are thin fabrics made of synthetic, natural or mixed fibers. They can be either plain-painted or printed. Remember that a pure silk lining can shrink every wash, therefore, such fabric must be wetted before cutting and make sufficient reserves and allowances, anticipating this very shrinkage.
Sliding pads are called differently. Often the name of the fabric depends on the nature of the weave. For example, satin, satin, diagonal. The linings are also jacquard, that is, their threads are intertwined in some complex pattern.
The names can also be based on the composition of the fabric. For example, polyester, viscose, nylon, silk.
 You can use cotton or wool flannel or flannel as a non-slip lining. If the fabric is completely natural, then do not forget about future significant shrinkage.
And remember, if the lining does not slip, it can only be used in large-volume products - oversized, trapezoid, cocoon.
Fleece can be a good option for a non-slip lining - it washes well, does not shrink, is breathable and retains heat well.
The lining, quilted with insulation, in turn, also has several varieties. There are two main ones - the stitching seam is made with threads or it is a thermal stitch. Quilted lining on padding polyester is more common. Despite the obvious advantages of this lining, there are, of course, disadvantages.
The main disadvantage is the inability to select materials individually. For thread quilting, the disadvantage may be large, easy to unravel stitches, and for thermal quilting, it can be stiff.
Fur lining, as you guessed, can be artificial or natural.
Natural fur is an expensive pleasure, requiring skills and subtle understanding in choosing. As for faux fur, the main criteria should be the softness of the knitted base of the fur and the short length of the pile.
Do not confuse faux fur and footer with “fur” fleece - they have different densities of the knitted base, and the fur is different.
If you bought a “fur” footer instead of fur, you can make a lining out of it in the form of a vest or with sleeves, and put the down jacket itself on a regular lining.
Insulation materials that are found and can be used for sewing at home
Pooh
If you are sewing a down jacket with down, you may need thick fabric for the cover so that the down jacket can be machine washed. The cover with down can be removed from the down jacket by first removing the down “quilt” from it, if such an option is provided during sewing. This is convenient when washing.
When buying down, you need to understand that it cannot be 100% down; there will also be small feathers among it. But the higher the quality of the down, the fewer feathers.
If you collect down yourself or buy it in the countryside, do not forget to disinfect it before sewing the down jacket. This can be done in a workshop where pillows are restored.
The best down is goose, and no frost is scary with it if it is covered with a membrane raincoat on top.
When using natural fluff, you must remember that it can cause allergies, especially in children.
Bio-fluff Sustans
Bio-down is a bio-based insulation, which is patented in the USA. It has all the properties of down, but is hypoallergenic, more durable and holds its shape better. However, it is rare and expensive.
Holofiber
 Holofiber, polyfiber, fiberskin, isosoft and similar polyester insulation materials can be considered analogues of down in terms of thermal insulation properties. You can also use them to sew inexpensive jackets and down jackets, stuff pillows and children's toys.
It tolerates machine washing perfectly, and together with the “membrane” it can withstand any frost.
The only drawback is the release form - balls - you have to work with it like fluff.
A similar material can be called primaloft - it is very soft, but resistant to deformation. It was used to sew warm clothing for the American army.
Wool
Natural wool insulation made from sheep or goat hair is also good and does not cause allergic reactions, but they strongly absorb moisture and have a noticeable weight compared to synthetics.
They require dry cleaning as they shrink greatly when washed.
Because of these shortcomings, the popularity of wool batting is low today. But wool is often added to synthetic fibers.
Mixed insulation retains heat well even at minus 25 and can withstand delicate machine washing.
Alpaca, llama, Angora and Kashmir goat wool fibers are used for sewing and knitting clothes.
Batting
Today it is rarely used, but in some cases batting is indispensable. The composition of the batting can be either pure wool or half-woolen with the addition of cotton or synthetic fibers.
Of the obvious advantages, it can be noted that the batting holds its shape and heat well, but it is still quite heavy and, absorbing moisture, becomes even heavier.
|
|
Sintepooh
Perhaps one of the most common insulation materials for clothing. Synthetic down is also called artificial swan down. It is produced in varying degrees of hardness and thickness. The roll width is 150 cm, and the thickness is indicated by the numbers 100, 120, 150, 200, 300.
The number indicates how many grams of material are per square meter.
To roughly estimate the thickness by numbers, “one hundred” is a fairly thin synthetic down, for demi-season products or for separate quilting of the “top” and lining, 150 is medium thickness, all-season, and “three hundred” is thick, winter.
Of course, you can also add a second thin layer to medium and thick insulation, but this is already a technology. Let's return to materials science.
Thinsulate
Another artificial down, which is considered one of the most elastic, light and warm insulating materials. Manufacturers claim that Thinsulate is warmer than natural down. But it is very expensive and therefore has not caught on with us.
Sintepon
It has a wide range of applications, wear-resistant, light and soft. The old padding polyester was relatively dense, but the new one has hollow fibers and has become better at retaining heat.
The main disadvantage is its lack of elasticity - it loses its thickness with wear and washing, and is also not suitable for very cold winters. The limit of padding polyester is minus 10 degrees.
The second name for padding polyester is silicone.
The thickness is also determined by numbers from 50 to 600 g/m2, width – 150 cm.
Hollosoft
Light and springy material, similar to Thinsulate. Its fibers are hollow and spiral-shaped. Hollosoft springs well and retains heat remarkably well.
It can be used for sewing quilted items, for example, for a down jacket or a warm vest with a fur trim.
Thermoloft
Another lightweight elastic insulation material that is suitable for sewing jackets and parkas, as well as overalls and down jackets. Density-thickness from 80 to 250 g/m2.
Sherstopon
Even from the name it is clear that this is a mixture of synthetic and natural fibers. It is made with the addition of sheep and camel wool.
Thickness and density are determined by numbers from 100 to 250 g/m2, width – 150 cm.
Sherstopon is used both for sewing clothes and for making sleeping bags and quilts.
Slimtex
Thin and fairly dense insulation, which is suitable for sewing jackets, coats, raincoats and fur coats, as well as for ski trousers and overalls. Slimtex is also used for sewing blankets, making shoes and hats.
This is a synthetic non-woven material, the density of which is also determined by weight from 100 to 250. Width - 150 cm.
Slimtex is a good choice for sewing winter overalls.
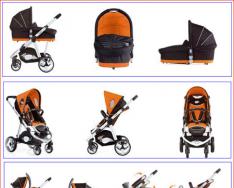
A down jacket is a fairly versatile and functional piece of outerwear that can protect you from even the most severe frosts. Sometimes, unfortunately, for some reason, the products offered on the market or in stores are simply not suitable. But don’t give up right away. We will tell you how to sew a down jacket with your own hands. As a result, you will receive a high-quality sewn and designer product that will suit you, taking into account the characteristics of your figure, and the costs will be several times lower.
How to sew a down jacket with your own hands? Master Class
To sew this type of outerwear you will need the following tools and materials:
- 1.5-2 meters of main fabric for exterior decoration;
- 1.5 meters of lining fabric;
- 500-600 grams of fluff;
Important! You can use both natural down and its various synthetic analogues, such as Isosoft or Thinsulate, for filling.
- 3 meters of fabric for the inside;
- Detachable zipper 80-85 centimeters long;
- Narrow and flexible braid;
- Tailor's needles;
- Tailor's marker or soap;
- Tape measure;
- Threads in color;
- Needles;
- Scissors;
- Sewing machine.
Important! Please note that for external finishing the fabric must be water-repellent with special impregnation.

Once everything is prepared, you can safely begin the process of making a down jacket with your own hands. The procedure is as follows:
- First, create a full-size pattern for the future product. For these purposes, you can use absolutely any model you like.
Important! The pattern should be one size larger. This is due to the fact that the finished product is compacted due to the down lining.
- Cut out the blank elements for the outer and inner parts.
Important! Don't forget to leave 1.5-2 centimeters of fabric for allowances.
- Make side and shoulder seams on the elements intended for the inside of the product. Afterwards, fold them right sides together and stitch the necks and fasteners.
- Fill the finished piece with down and quilt it into squares measuring 6x6 centimeters.
- Fold the sleeve elements right sides together and stitch them, leaving a cut along the armhole.
- Fill the sleeves with down and quilt them in the same way as the main piece.
- Stitch the elbow sections of the sleeves, then sew them into the armholes.
- Connect all the parts of the hood, sew it into the upper part of the down jacket.
Important! For the hood, instead of lining, you can use regular padding polyester.
- Sew all the cuffs. To do this, cut out a rectangle equal to the width of the cuff x2, and a length equal to the circumference of the wrist + 3 centimeters from the main fabric. Fold them in half and sew the side seams.
- Fold the finished piece with the wrong side inward and lay parallel lines, leaving an unstitched space of 1 centimeter on each line.
- Using pins, pull the ribbon through the unstitched hole.
- Stick the inner and lining into the blank for the top.
- Align all the cuts and secure them with tailor's pins.
- Sew all three layers of the future product along the side and shoulder seams.
- At the neck of the lining, fold the cut towards the wrong side. Sew it to the hood stitching seam.
- Sew the finished cuffs to the bottom of the sleeves.
- Fold the bottom hem towards the wrong side and stitch it.
How to update a down jacket with your own hands?
If you have an old down jacket lying around in your closet, do not rush to throw it away immediately. With basic cutting and sewing skills, you can create a unique designer item from an old piece of outerwear. In order to sew such a down jacket with your own hands, you will need the following materials and tools:
- Old down jacket;
- 60 centimeters of padding polyester;
- Water-repellent fabric 2.5 meters;
- Lining fabric 1.7 meters;
- Detachable lock 70 and 40 centimeters long;
- Sewing machine;
- Scissors;
- Needles;
- Threads in color;
- Tailor's pins;
- Tailor's marker or soap.
Important! Please note that the specified fabric parameters are designed for sizes 46-48. If your parameters differ, then the amount of fabric must be purchased based on them.

Once the necessary equipment has been prepared, you can proceed directly to work. The sequence of actions is as follows:
- Pull out the filling from the old down jacket, then cut it into pattern pieces.
- Applying the old parts to the main fabric, cut out new ones. This way you should have:
- 2 shelves;
- Back;
- 2 sleeves;
- Collar;
- 2 parts for the middle of the hood;
- 4 side hood pieces.
- From padding polyester, cut out 2 side and 1 central part of the hood, as well as 1 part of the collar.
- Cut out pockets from the main fabric and 2 burlap pockets.
- Cut out all the main parts from the lining fabric.
Important! All parts that are cut from lining fabric should be 1 centimeter shorter than the same ones, only from the main one.
- Attach the top parts made of the main fabric with the same ones made of insulation, stitch them together.
Important! The insulation on the right shelf should be ground in by hand.
- From the wrong side, pin the padding polyester piece to the plank so that it overlaps the old insulation.
- Sew the padding polyester to the insulation along the edges of the plank.
- Use a sewing machine to sew seams from the neckline to the bottom of the front.
- Place the zipper with the outer side on the top shelf from the neck to the cut, pointing it down. Sew the zipper.
- Fold the right shelf with the left front side inward so that the middle of the front remains free.
- Turn the zipper on the left shelf towards the cut, and pin the right part to the cut of the right shelf.
- Sew the shoulder seams and press the seam allowances.
- Sew the side seams from the armhole to the top edge of the pocket entrance. Iron them.
- Place the burlap pocket made from the main fabric against the back, turn it forward, and straighten it out. Sew it like this to the back.
- Sew the edges of the lining to the edges and press the seams.
- Sew side and shoulder seams, as well as seam allowances.
- Attach a loop of dart cord to the center of the back.
- Fold the top of the down jacket with the lining face inward, stitch the sides.
- Cut the collar with padding polyester and stitch along the edge.
- Place the zipper from the hood on the cut and, aligning the middle of the collar, stitch it.
- Turn the free ends of the zipper tape towards the cut.
- Fold the collar in half lengthwise, right side inward, and stitch the sides. Turn out and straighten the corners.
- Baste the collar with the neck of the down jacket, as well as the top of the back and lining. Sew them using a sewing machine.
- Sew the seams on the sleeves, placing them along the edges.
- Turn the sleeves inside out and sew them into the lining.
- Match the shoulder seams of the top and lining, aligning them with the sleeves.
- Turn the hem of the bottom of the down jacket to the wrong side, baste a centimeter from the fold, not reaching the middle of the front part.
- Fasten the hem at the bottom in several places.
- Turn the down jacket right side out through the gap in the lining.
- Sew the placket and sew buttons in several places.
- Sew the side elements of the hood to the middle piece.
- Unfasten half of the lock from the collar and place it with the outer side on the bottom of the hood, align the middles, and stitch.
- Baste the outer sides of the hood together, machine stitching 2 centimeters from the fold.
- Sew the bottom of the hood and fasten it to the down jacket.
- Remove all threads from running stitches.
Your new down jacket is ready!
Description of appearance:
Women's insulated down jacket coat with a central side fastener with a zipper and six buttons. Coat with a cocoon silhouette, with a curved hem, length below the knee line. A shelf with a dart-undercut from the side seam, in which a pocket with a finishing flap is processed. The back is one-piece. Single-seam set-in sleeve. The collar is a stand-up collar, fastened with buttons. Down jacket with a removable hood fastened with a zipper. The hood can be decorated with a “fur trim”.
Difficulty level: not difficult, but takes time and patience
Technical drawing of the model:
Structural additions to this model: to chest circumference 20 cm, to waist circumference 32 cm; to hip circumference 15-18 cm.
Material recommendations: the main material is from the group of raincoat fabrics, plain; insulation - (artificial (synthetic winterizer) or mixed layer with natural additives (cotton, sheep or camel wool) or their substitutes (bamboo, swan's down) surface density - 200-300 g/m2. Lining material - based on viscose fibers and threads in color combination or contrast with the main material.
Pattern sample:

* PRINTING ON A4 FORMAT PRINTER:
When printing patterns in A4 format, open Adobe Reader and check the "Actual size" checkbox (or uncheck "Fit to page size") in the print settings.
Note the test square (or grid) on the pattern sheet. Its size is exactly 10 by 10 cm. It is needed in order to understand whether the printing scale is set correctly on your printer. Before printing the entire pattern, print out a sheet with a red square and measure it. 10cm sides? This means you can print the remaining pattern sheets. If the sides are more or less than 10 cm, you need to adjust the print scale of your printer. Otherwise, the pattern will not print correctly.
After printing all the pattern pages, glue them together in the order shown: the letters (A/B/C+) indicate the column, and the numbers (01/02/03+) indicate the row. The first (top left) pattern sheet will have the number A01.
*PRINTING ON A PLOTTER:
When printing a pattern on a plotter, open the pattern file in Adobe Reader (or Foxit Reader). Click on the "File" menu item, then select "Print". Select the Poster print mode under Page Sizing and Handling. Make sure the Segment Scale field is set to 100%. Check the boxes for Cutting Marks, Shortcuts, and Split Large Pages Only.
The following designations are used on the pattern:
.png)
Parts Specification
Main material
Back - 1 piece
Right shelf – 1 piece
Left shelf – 1 piece
Collar – 2 parts
Part of the right hem – 1 piece
Sleeve – 2 parts
Hood – 2 parts
Hood insert – 1 piece
Hood facing – 1 piece
Strap for attaching the hood – 1 piece
Top stand – 1 piece
Lower stand – 1 piece
Back neck facing – 1 piece
Hemming of the bottom line of the back - 1 piece
Facing the bottom line of the shelf - 2 parts
Pocket flap – 4 parts
Burlap (lining) pocket – 4 parts
Lining material
Back – 1 piece (with fold)
Shelf – 1 piece
Sleeve – 2 parts
Hood lining – 2 parts
Hood insert – 1 piece
.png)
Attention! When cutting parts, you need to add seam allowances along all sections of 1.5 cm. The allowance for processing the lower cut of the sleeves depends on whether you will bend the sleeves and form them from the allowance for processing the cuffs. If the lining material strictly matches the color of the main one and along the bottom of the sleeve you decide to sew a finishing line and leave the sleeves without turn-down cuffs, then the processing allowance is 1.5 - 3.5 cm.
Approximate consumption of base material 3.0-4.0 meters (depending on size and height), with a canvas width of 150 cm.
Attention! The figure shows the arrangement of parts on the canvas for size/height – 44/170 cm.
.png)

To make a down jacket you will also need:
- lining material – 2.0 – 2.5 m;
Detachable zipper – 70-85 cm, depending on height;
Insulation - 2.5 - 3.5 m, depending on its width and the size and height of the product;
Buttons – 8 (9) pieces;
The zipper for attaching the hood is 35-45 cm, depending on the size (you need to measure the length of the lower cut of the hood part - 2 parts + insert);
Fur trim for a hood made of natural or faux fur.
Technological sequence of processing
1. Baste all the parts cut from the base material onto the insulation. Apply a pattern quilting stitch to all pieces on the right side of the material.
Attention! In the store you can find special felt-tip pens or crayons that are removed after heat treatment. You can apply a design, and after quilting, remove the lines with a warm iron.
Attention! To simplify the process of quilting the base material with insulation, try gluing it. Yes! I use a simple glue stick. I lightly lubricate the edges of the parts of the main material with glue from the wrong side, lay the insulation on it, press it and leave it for 5 minutes. You can also spot lubricate the material along the quilting lines. Don't overdo it! First try on lunges that will remain from cutting. Believe me, it really is easier this way.
2.Sew the quilting stitch according to the pattern. Stitch length is 0.4-0.5 cm (Fig. 1).
Attention! Do not tighten the thread, and if possible, use a walking foot.
.png)
Process the pockets on the shelves as shown in Fig. 2 and fig. 3.

Stitch the flap with the lining, turn the flap right side out and stitch the seam allowances of the flap stitching onto the lining;
Place the pockets you made on the shelf (Fig. 2), according to the control marks, and stitch the valve and burlap parts of the pocket to the shelf in sequence;
Stitch the topstitch seam allowances onto the lining;
Sew the burlap pocket pieces
Sew darts on the shelf in the area before and after the entry line into the pocket
Sew the front and back along the shoulder sections. Press seam allowances.
Sew the front and back of the coat along the side edges. Press seam allowances.
Determine the length of the strap by the length of the zipper. Stitch the sides of the zipper placket and iron it in half.
Baste and stitch the strip on the front side of the product along the neckline, strictly in the middle relative to the middle of the back, aligning the cuts;
Stitch one side of the zipper along the stitching edge of the placket
Stitch the front hem line and the back hem line along the sides. It is better to iron the seam allowances
Attention! Ironing operations must be treated very carefully. The process of ironing seams should not lead to flattening of the insulation.
Prepare the collar.
The collar assembly algorithm is classic and practically no different from processing the stand-up collar of a jacket:
Stitch the top post to the bottom along the edge, turn it right side out, sweep the edge and iron it.
Sew the top collar into the neck of the down jacket. Press the seam allowances onto the collar.
Process the clasp.
The design of the clasp is also quite simple. The right shelf is wider than the left by the width of the bar. The bar is designed for attaching buttons. A hem is sewn along the edge of the bar on the inside and one side of the zipper is inserted into this seam. The second side of the zipper is inserted into the seam of the seam of the cut side of the left shelf (Fig. 4).

Rice. 4
- stitch one side of the zipper tape to the hem along the inner cut (line 1);
- stitch the bar to the hem (line 2);
- stitch the facing of the back neckline to the hems along the side edges;
- sew the lower stand into the hem and facing of the back neckline;
- grind the cut of the side of the right shelf with a hem, while simultaneously grinding the side of the collar;
Size 56
A down jacket made of shiny raincoat fabric with a hood trimmed with fox fur is suitable for a woman of any age.
To complete the model you will need: 1.6 m of raincoat fabric of practical colors 1.5 m wide, 1.3 m of lining fabric 1.5 m wide, 1.3 m of synthetic padding, shoulder pads, zipper, strip of natural , fur for the hood trim:
Cut out down jacket patterns
Shelf - 2 parts
Back. 2 parts
Hood - 2 parts
Sleeve - 2 parts
Leaflet for welt pocket - 4 parts
Cut out all the parts from the main, lining and synthetic padding fabric (Fig. 8, b), while making seam allowances of 1.5 cm.
In addition to the listed details, you need to cut out 2 burlap pockets measuring 18 x 20 cm from the main and lining fabric.
Description of work
Make welt pockets with a leaf on both sides of the jacket. Pull out the leaves cleanly and stitch from the front side to the edge. Attach the front side of the leaf to the front side of the shelf and stitch along the markings. Pin the burlap pocket made from the main fabric to the cut line opposite the leaf and stitch it, leaving 0.5 cm on each side of the seam. Make a cut, cut diagonally towards the ends of the lines, being careful not to touch the pocket details. Turn the burlap fabric inside out and iron the leaf onto the cut. Sew the burlap pocket from the lining fabric to the seam allowances of the stitching leaves. Turn the triangles in the corners of the slit to the wrong side and stitch them onto the burlap pockets, which are then aligned and stitched together. Sew the narrow sides of the leaf to the shelves using hidden stitches.
Attach the parts made of padding polyester to the parts made of the Main fabric, lay the lines on the front side in the form of stripes at the same distance.
Connect the shelves and the back with a basting seam, sew the side and shoulder seams.
Sew the edges of the sleeves from the wrong side and turn them right side out.
Sew in the sleeves, slightly fitting them along the edges. Attach shoulder pads to the shoulder seams.
Carefully stitch together the parts of the hood, first making darts. Sew the hood pieces from the lining fabric and stitch the lining to the under-flex of the hood from the wrong side. Turn the hood right side out and sew it into the neck of the jacket.
Sew the seams of the lining fabric parts together, stitch the lining flaps to the inner edges of the main fabric lining.
Stitch, shoulders shvzh lining and seams on the sleeves, which are then sewn into the armholes of the lining.
Fold up the sleeves of the jacket and carefully connect them to the lining fabric.
Sew the zipper between the main fabric lining.

Down jacket pattern - cut details; 1 - shelf; 2 - back; 3 — hood; 4 — sleeve; 5 - leaflet for welt pocket. (Enlarge the pattern by 10.1 times.)
Relationship