The well-known film “Star Wars” is loved by both adults and children. Just recently, another premiere of another film, Star Wars: The Force Awakens, took place and fans are probably rejoicing.
The news portal “site” decided to dedicate this article to all those who are true fans of this film, “Star Wars”. We are almost sure that each of you has your own small collection of interior items, T-shirts and caps, key rings and glasses, mini figurines and other things depicting your favorite characters, which you bought in specialized stores and shops.
We offer to replenish your collections with homemade unique items. From this article you will learn how to make realistic masks of your favorite characters, a keychain, a piñata and a fashionable headband with the hairstyle of Princess Leia herself.
Headband (winter ears) with Princess Leia hairstyle
 You can use the finished headband as a winter accessory that will warm your ears even in severe frost. Or you can use it as a bright addition to Princess Leia’s carnival costume.
To make a headband you will need: yarn, an old hairband.
Detailed master class on making a headband with Princess Leia's hairstyle in the video:
DIY Death Star pinata
 This amazing themed craft will be a great addition to any Star Wars themed party. The “Death Star” filled with sweets and small gifts will give a great mood and unforgettable impressions to any company.
Detailed master class on making the Death Star piñata in the video:
DIY Darth Vader mask
 Do you want to be the brightest and most unforgettable character at any themed party or carnival? Then be sure to make a papier mache mask of the legendary Darth Vader.
Detailed master class on making a Darth Vader mask in the video:
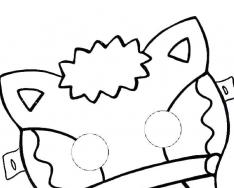
DIY Kylo Ren mask
 We present to your attention another bright character - the Star Wars villain Kylo Ren. You can wear the finished mask to a costume party or give it to a friend-fan.
Detailed master class on making a Kylo Ren mask in the video:
DIY R2D2 keychain
 A great gift for a Star Wars fan is the famous robot R2D2. And if R2D2 is also a keychain, then it’s doubly nice, because you can always take it with you like a faithful friend.
Detailed master class on making an R2D2 keychain in the video:
DIY Master Yoda ears
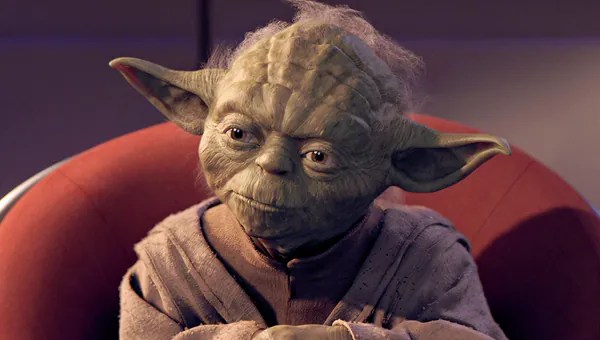 Another wonderful accessory, Master Yoda ears, which will make you irresistible/irresistible at any party. Do you like to have fun and surprise, and are you also a Star Wars fan? Get to work!
Detailed master class on making Master Yoda's ears in the video:
I live in a city with a long pedestrian street, where most of the retail outlets, cafes, etc. are located. This is the most pedestrian street in our city. I came up with an idea, why not make a First Order Stormtrooper costume from Star Wars to hand out flyers. And not only for distribution, you can do animation, etc. People will often approach a person in such a suit to take a photo, for example.
 The first step is to install the Pepakura Designer program and download the patterns you need. The suit is for a height of 176 cm, but the stormtrooper suit is universal, because it is composite, it will suit people from 170 to 188, although you can always change the sizes in the program itself.
  The scans need to be printed on paper with a density of 200-220, this is the density of whatman paper. I glued it with PVA glue. This is what almost the entire printed and glued suit looks like. Many parts don't have spacers yet.
  I started with the helmet, unfortunately I didn’t immediately start taking photos, first I glued the helmet together, then reinforced it from the inside with polyester resin and glass mat. Under no circumstances should you work with this stinking rubbish at home, even on the balcony, the smell will take a long time to dissipate. I worked in a garage, I definitely needed a respirator and gloves. After I secured the helmet, I noticed that the front was very bad, so I had to cut it out, print it again and paste it in.
  Below are a few photos after puttying and sanding; I putty with wood putty, it is non-toxic.

 Using cold welding, I expanded parts that were not in the paper pattern. As a result, I redid these parts about 10 times. I also corrected the place above the bridge of the nose; in the development it is not protruding enough.
  Halfway to the end of the work, I learned about such a wonderful tool as a template pattern, although it has many other names, I ordered it on Ali. And then the long and hard work began, because I set myself the task of making the helmet as symmetrical as possible.
  I found the middle points on the helmet, drew circles with a compass, drew them, and started from them to level the helmet on both sides.
  I noticed that many people who made such helmets simply drilled out the holes for them. And I wanted to make honeycombs, just like in the original helmet. I asked a friend who does laser cutting of metal, but nothing came of it, the distance between the holes was 0.7 mm, the metal was twisting and moving. An unexpected idea came to mind: why not cut self-adhesive tape on a plotter and stick it in several layers? I went to an advertising agency and found out that cutting several A4 sheets would cost me almost 500 euros, they charge me for the length of the cut, and it was at least 200 m. I remembered that at my last job I had a plotter and went there and asked my former boss for evening. The whole thing took 8 hours to cut.

 10 glued layers gave the desired thickness of 1 mm.
Below are the final photos, the black paint is a primer. Before priming, the helmet was sanded with 440 grit sandpaper. 
 Next came plastic casting; for this we needed to make a copy of the helmet. All this time I was making a master model. This is done using silicone. Let me get ahead of myself and say that I made several unsuccessful silicone castings, the final result is after the 3rd casting and it was not successful enough, I had to putty a little, the 4th casting will be the most ideal. Silicone over the helmet.
  Glass mat and polyester shell
  My mistake in 3 not very successful castings was in this glass mat shell, the fact is that if there is not a sufficient fit with the silicone by at least 1 mm, then the silicone will eventually bend and when filled with plastic there will be dents on the copy. Only after the 3rd casting did I find out that there is a paste, it is thick and is used just to create a shell, it perfectly covers the entire area and hardens. Looks like plastic.
The photo shows the result of the last casting. I had to putty a little. How is it filled with plastic? The mold is removed from the helmet, inserted into the shell, then two-component liquid plastic is poured into different cups in equal proportions, poured into one, mixed. Next, we pour this glass into the helmet and begin to rotate, the plastic hardens in 15 minutes. This helmet took 860 grams of plastic. Together with painting and interior foam finishing, the helmet weighs approximately 1-1.1 kg.  Next I had the task of making a visor (lens) for the helmet, many cosplayers take a thick transparent cover and glue car tint on top and glue it into the helmet, it looks good, but I wanted better. I wanted to make the glass convex, just like a real helmet. For this, the unsuccessful first casting came in handy; I cut out the part where the eyes are located and, using automotive putty, bolts, and nuts, strengthened the bottom so that the shape became solid. Then, using cold welding, I began to shape the top.
  The 1.5 mm thick plexiglass is easily bent using a hair dryer. I made a lens from transparent plexiglass; black translucent one was impossible to find. I glued the tint, but there were folds in the bends, even a hair dryer didn’t help. Unexpectedly, I found black translucent plexiglass at the car market; a car deflector is perfect for the lens.
  Next is painting with an airbrush. My total expenses for creating a suit and helmet today are about 500 dollars, this cost includes tools, materials, by the way, I often used cold welding, according to my calculations it took 1 kg. Silicone and plastic are not cheap. Almost the entire suit is reinforced with polyester and glass mat, but not puttied yet. A few final photos. More than 500 hours of work were spent on the helmet.
  Next, my plans are to finish the entire costume, convert a helmet from one casting into Captain Phasma’s helmet and finish Kylo Ren’s helmet, I already found the original fabric like in the film for sewing the costume on a foreign website.
Why was so much time wasted? 500 hours is exactly that, maybe more, many times I reworked the same areas to achieve symmetry, down to 1 mm.
Today we present to your attention 4 designs of imperial stormtrooper helmets.
Imperial stormtroopers came to us from the Star Wars universe. They are the elite fighters of the Galactic Empire, who were called upon to convey the will of the Emperor to the “infidels” and keep thousands of star systems at bay.
The first helmet model is high-poly, not so easy to assemble, takes 12 pages in pepakura, textures are present.

Paper stormtrooper helmet -
The second model of the helmet is designed for foam, located on 8 sheets, textures, of course, are absent, repeating details are moved outside the sheets.

Foam Stormtrooper -
And the third helmet is the helmet of the new stormtroopers from " Star wars. Episode VII: The Force Awakens". The film itself will be released only in December 2015, but a teaser has already been released, which showed a landing of stormtroopers: 
The craftsmen have already drawn and developed such a helmet, in pepakura it is located on 25 pages, without textures, it is very difficult to assemble, but I think it’s worth it. 
Make a new stormtrooper helmet -
In the comments they expressed dissatisfaction with the helmet from the 7th episode, and finally another scan of this helmet has appeared, with great joy we post it for your consideration. The model itself has fewer polygons and made the shape of the helmet close to the original. The development takes 24 pages in pepakura, it is assembled in an average manner, but it may be difficult to assemble small parts, but they can be made from available materials. There are primitive textures.
Every fan must have a white stormtrooper helmet from the Star Wars saga. Interest in the universe created by George Lucas is so great that people are willing to spend huge amounts of money and time to create costumes exactly like those of the film characters. The characters and costumes of the story are so well thought out that it is not at all easy to do.
Fans know that there are more than eight types of helmets alone. The costumes of stormtroopers of different types of troops also differ from each other. But if a fan has firmly decided on something, then nothing is impossible.
Creating a design layout for a Star Wars stormtrooper costume
The first step is to choose the costume that needs to be made. Once you have decided, find as many high-quality images of the characters in costume as possible to examine the outfit and equipment from different angles in great detail. For example, you can take a first order attack aircraft, the photo of which is given below.
It is necessary to carefully study the suit, select parts and elements that can be replaced with ready-made things, for example, look for similar shoes among old shoes and simply paint them white, pockets and bandoleers can be replaced with plastic boxes, and the role of an elastic underwear suit will perfectly play a black thin turtleneck and knitted pants.
It is known that the stormtrooper armor from the first Star Wars film had 18 parts. Consider the level of detail of the costume: instead of 18 parts, you can make 10, but the character’s costume will still remain recognizable. The following image shows the main parts of the stormtrooper suit armor.

Templates for stormtrooper costumes and helmets are freely available. Finding patterns to suit your size will not be so easy. You can cut out the suit using ready-made patterns from plain paper, glue it together and arrange a fitting. Selecting and editing ready-made drawings can take a lot of time and effort; sometimes it’s easier to do it from scratch than to edit already finished work. The helmet drawings are worthy of attention in the finished patterns - you can safely take them to work.
Choosing material for a stormtrooper suit
The choice of material determines all further work on the costume. The helmet can be made from plastic bottles, papier-mâché and cardboard. When choosing the first option, you will need to look for a bottle that is similar in shape and suitable in size; for papier-mâché, you need to think about what to make the base from and whether the artist’s artistic skills will be sufficient for this, and if you choose cardboard, you will also need putty or epoxy resin to strengthen the product.
Regardless of the material chosen, a lot of paint and varnish materials will be required:
- paint base;
- white spray paint;
- black spray paint;
- glue;
- black electrical tape;
- felt-tip pen;
- sharp knife for cutting thick cardboard;
- scissors.
How to make a stormtrooper costume out of paper
For a stormtrooper costume you will need a lot of thick cardboard. According to the layout of the outfit, draw the details of the costume on cardboard. Next, the blanks are cut out with a special sharp knife, the necessary folds are made and tried on for the future attack aircraft. If necessary, parts are shortened, and a fastening system is thought out depending on the individual dimensions of the model.
Parts made from thin cardboard are easier to bend - there are no bends left on them and they look better. The downside of such armor will be its fragility. Putty can help in this situation. It is necessary to dilute the putty and apply a thin layer to the inside of the armor.

When the parts of the costume are fitted and processed, apply a base to them, and after drying, cover them with white spray paint. It is better to apply black parts with a felt-tip pen over white paint.
Costume detailing
The most crucial moment in creating a stormtrooper costume with your own hands is the detailing. Even if inaccuracies and flaws were made at the stage of creating armor blanks, adding small details to the existing base will help correct the suit and make it easily recognizable.
It’s worth spending time in a toy store and trying to pick up the most similar models of plastic guns, boxes and other small and seemingly unimportant parts. If you do not find elements similar in shape and size, you can use polymer clay to make jewelry. It is necessary to sculpt on top of the armor and cover it with paint. Plastic weapons should also be painted in the signature black and white colors.
Making a stormtrooper helmet
As mentioned earlier, for a helmet it is better to take ready-made patterns that need to be cut out of simple cardboard. The helmet parts have a large number of small folds. They are all carefully cut out and glued together. The photo below shows the helmet already glued together.

To hide the joints, you can use electrical tape and cover the helmet. A thin layer of plaster must be applied on both sides. The helmet is then painted and the details are applied. The costume is ready!
Adviсe